

I remember doing this lesson as a kid, so I can't really credit any one person (except maybe one of my elementary Art teachers :).

Supplies:
8.5x11 heavy weight paper
Markers
Pencil
Ruler (optional)
Fold the paper in half horizontally, and cut the paper in half along the fold line (creating two 5x7 sheets). On one of the sheets trace your hand. You will use the other sheet as a guide sheet to draw the horizontal lines (or use a ruler).

(Not the best picture :p
Stay with me; it gets better! :)
Using the blank sheet as a guide (or a ruler) draw lines across the sheet every 1/2 inch. (you can have the kids make tic marks along each side of the paper every 1/2 inch and connect those tic marks to make the horizontal lines).
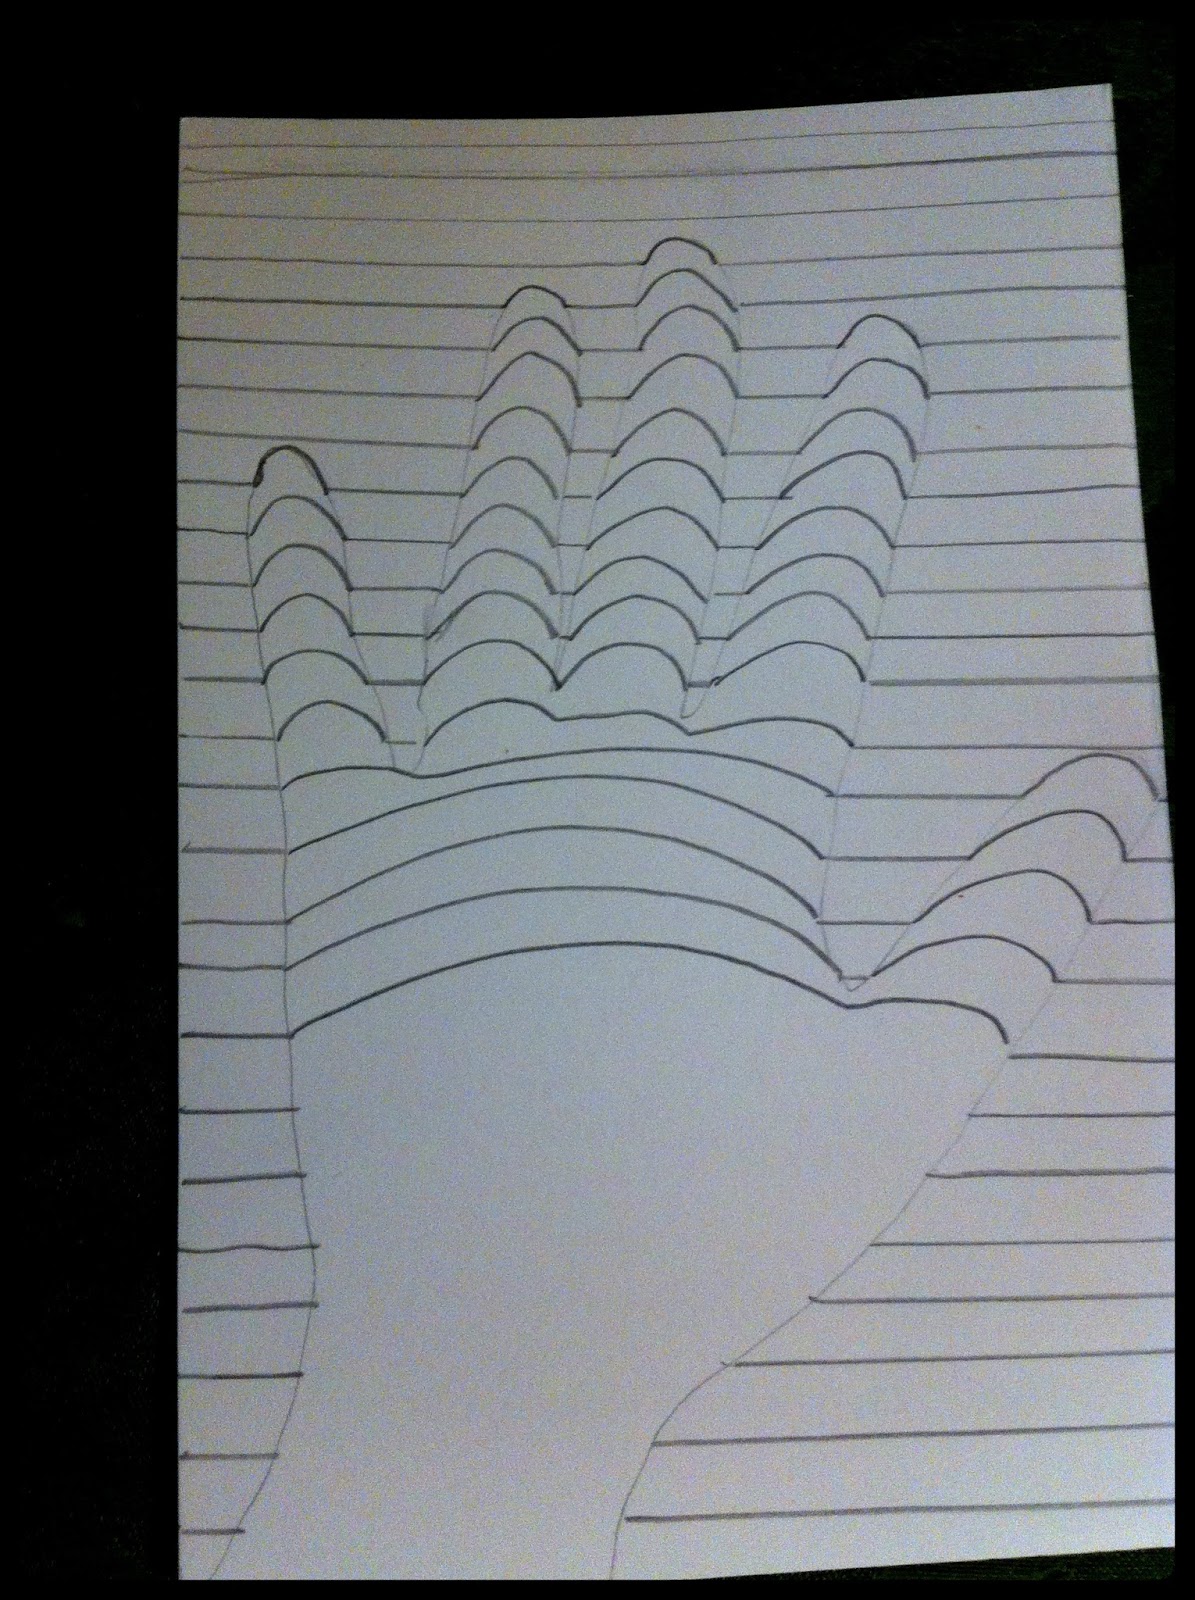
Do NOT draw into the hands. Make sure each line goes all the way across (you will add curved lines in the hands to connect each line later).

Once you have drawn horizontal lines all the way down the paper, it is time to draw in the curved lines in the hand. This can get tricky, so start with the fingers. First do the tips of the fingers, then connect the lines with curved lines down each finger until you reach the hand. Make sure the lines are very curved to create a contrast in the line.


*Note* The kids sometimes lose their place drawing the curved lines. Have them use the blank paper to keep their place by placing the paper on the line below the line they are working on adding curved lines to. Placing it on the line below the line they are working on allows them to see the line they are working on.

Adding the first "hand" lines can be tricky also. Using the blank paper to keep you connecting the right lines will definitely help.
Make the lines dramatically curved!
All finished with the lines!

Adding last little curved lines at the wrist.
Now to color! Use any colors you would like, but do not use the same color right next to one another. I have found that using at least 3 colors works best.
Draw along the line first with the color. Then with one smooth, continuous line after another fill in the stripe. The lines being fluid across will help create the illusion better than "chicken scratch" lines (that most kids want to do). Tell them to use their whole arm to draw the line ("elbow should be moving!"). Maybe practice this on the blank sheet of paper. Also, use the blank sheet under the project to catch marker marks ("all the way to the edge of the paper!")


I did this recently with a mixed age group at a day care. Sometimes while creating lesson plans, we get so wrapped up in creating something elaborate and spectacular, that we forget the basic lessons. This simple lesson can lead into much larger lessons and cover SO many basic elements (and principles) of art.
This lesson is for ages 4th grade and above.
My completed one.


5th Grader 1st Grader (Advanced)
(I helped him draw the initial lines)

The Kids getting their Art on!
---------------------------------------------------------------------------------
Next Blog's Project:
CUBES

The kids created these after they finished their "Op Hands." They loved these so much they wanted to make a TON more and build cities!