Saturday, November 23, 2013

Cube Cities


I have spent the semester in a local elementary art classroom.  These kids were great! and the teacher is so patient and willing and a wealth of art teacher knowledge.  I get to student teach with her in the spring, Yay!!

Last blog I said I would offer the Cube project.  Well, as I started in the art room, the cubes took a dramatic turn.  (I love finding simple project ideas and developing them into elaborate art lessons- I'm a total Ed. geek like that :)


Here is the Cube:


and how to make it:


NOTE: the size of the strips of paper depends on how large you want the cubes.  SIZES CAN VARY.

Here are the kids assembling their cubes
(this is a project for 4th grade and up)


This is where the "cubes" took a dramatic turn.  We were discussing how we could use the cubes.  Kids have the most amazing imaginations!
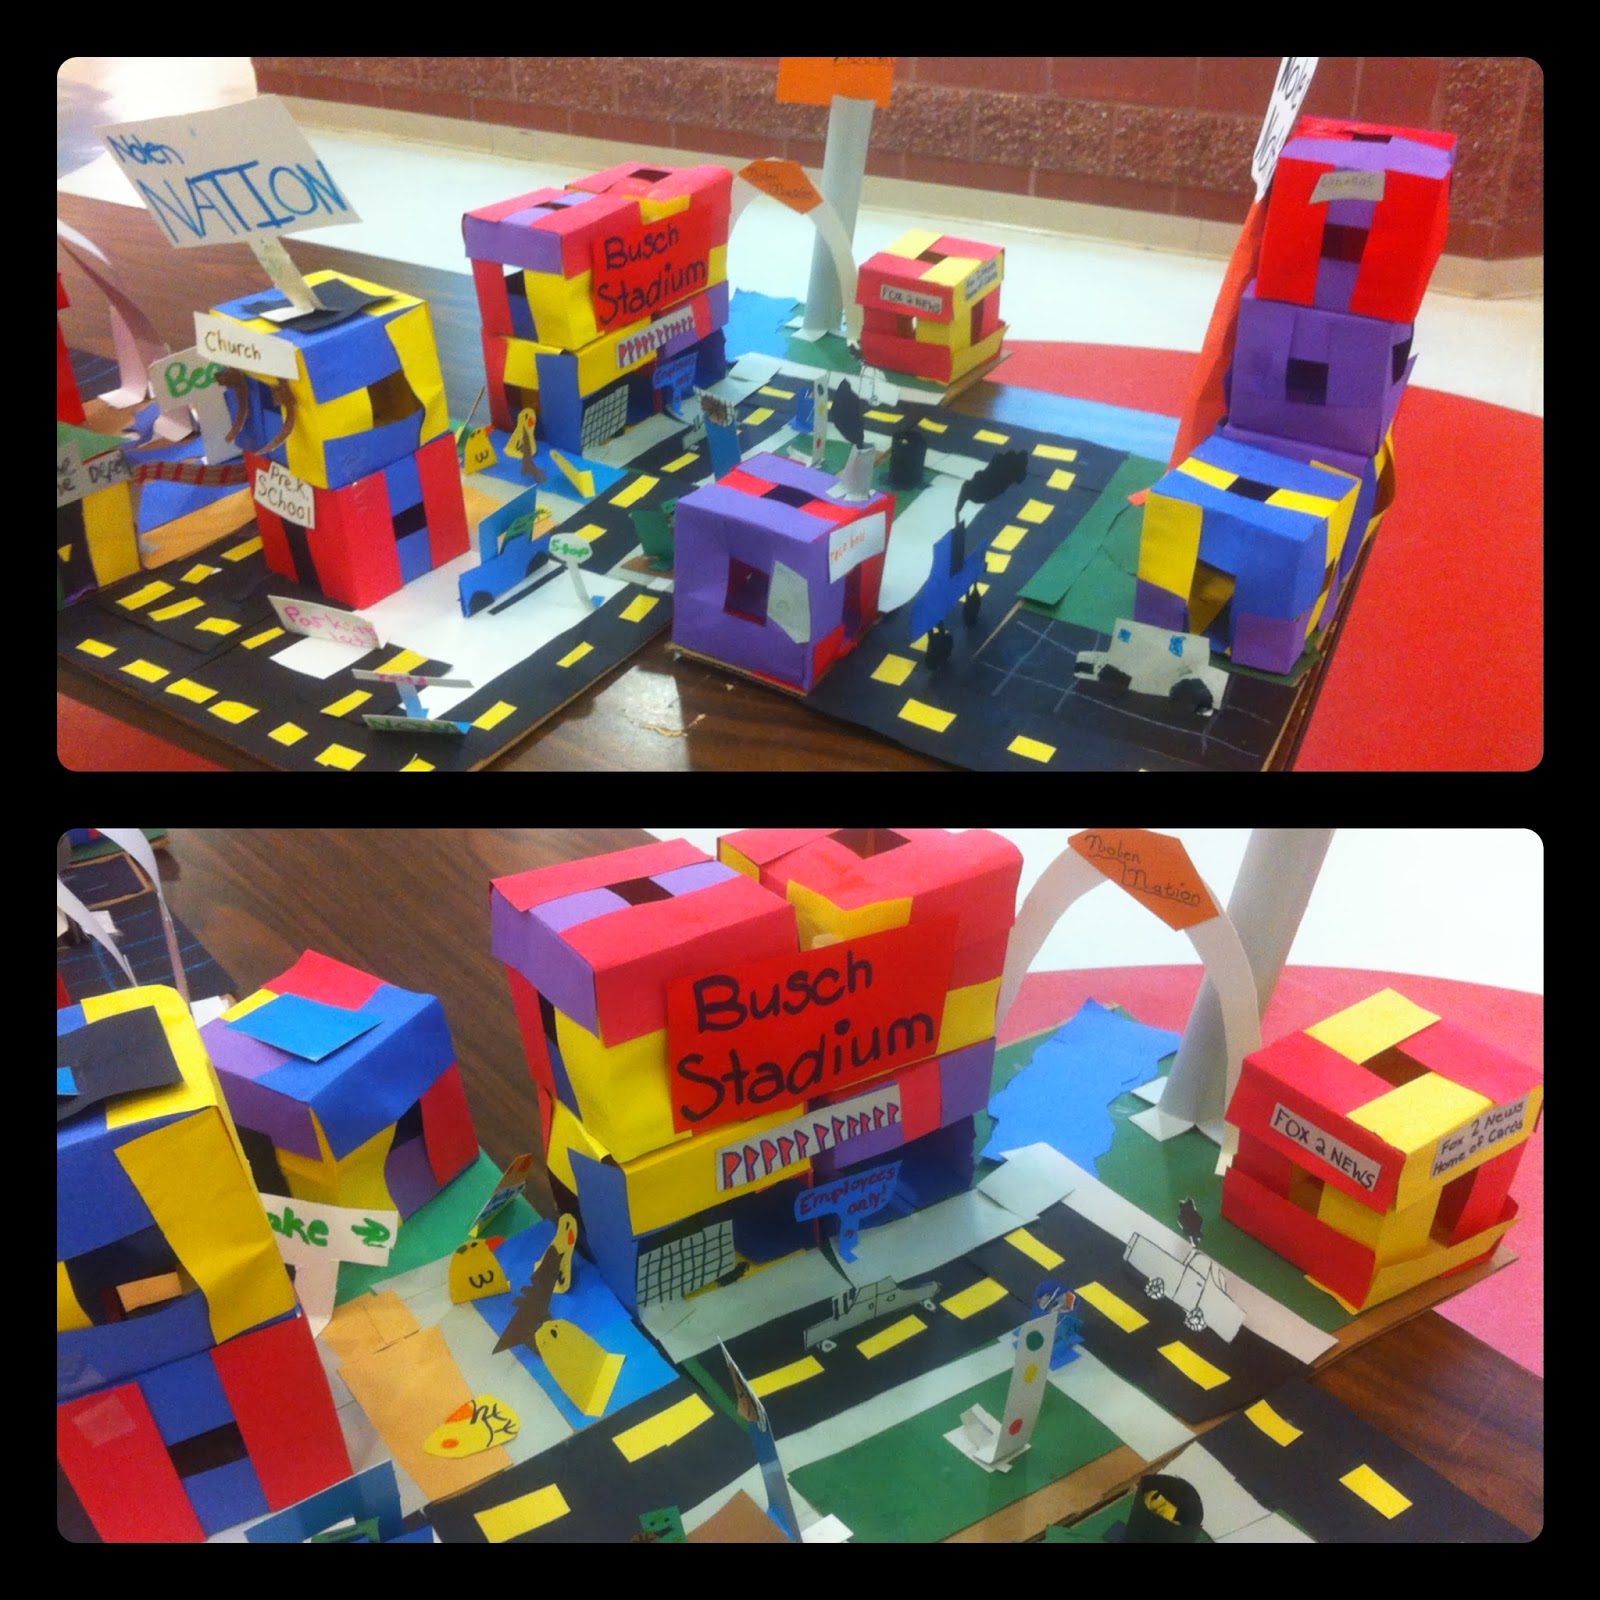

Cube Cities
(3D cityscapes)

Here is the constructivist lesson plan:
"Evaluate" is missing, but here is my basic rubric that I use with elementary students.
This one is for this specific project (concepts at the top would need to be changed per project).


After completing this lesson for the first time, there were SO many more components and concepts to be added. Mostly interdisciplinary ideas (ie: groups adding govt' buildings and such, since MO's 4th grade curriculum spirals with state govt' concepts- Maybe add some famous Missourian and architectural facts :).

So many great concepts could be incorporated!


Here are some more Project Progress Pics


The students had SO much fun working collaboratively on this project.  And they were SO excited to show their parents at their 4th grade concert (during which, they exhibit their art work in the hallways).

Here are the completed city blocks placed into their cities.  Each class came up with a name for their city.  

 The students learned various paper manipulation (folding) techniques to build their cubes and to make attachments.


The pictures don't do the details justice.


Happy teaching and creating!!
         
                 -Jessie


Friday, August 9, 2013

Optical Illusion Hand

I remember doing this lesson as a kid, so I can't really credit any one person (except maybe one of my elementary Art teachers :).


Supplies:
8.5x11 heavy weight paper
Markers
Pencil
Ruler (optional)     


Fold the paper in half horizontally, and cut the paper in half along the fold line (creating two 5x7 sheets). On one of the sheets trace your hand. You will use the other sheet as a guide sheet to draw the horizontal lines (or use a ruler).

(Not the best picture :p
Stay with me; it gets better! :) 


Using the blank sheet as a guide (or a ruler) draw lines across the sheet every 1/2 inch. (you can have the kids make tic marks along each side of the paper every 1/2 inch and connect those tic marks to make the horizontal lines).
 Do NOT draw into the hands.  Make sure each line goes all the way across (you will add curved  lines in the hands to connect each line later).


Once you have drawn horizontal lines all the way down the paper, it is time to draw in the curved lines in the hand.  This can get tricky, so start with the fingers.  First do the tips of the fingers, then connect the lines with curved lines down each finger until you reach the hand.  Make sure the lines are very curved to create a contrast in the line.


*Note* The kids sometimes lose their place drawing the  curved lines.  Have them use the blank paper to keep their place by placing the paper on the line below the line they are working on adding curved lines to. Placing it on the line below the line they are working on allows them to see the line they are working on. 


Adding the first "hand" lines can be tricky also.  Using the blank paper to keep you connecting the right lines will definitely help.  

Make the lines dramatically curved!


 All finished with the lines!

 Adding last little curved lines at the wrist.

Now to color!  Use any colors you would like, but do not use the same color right next to one another.  I have found that using at least 3 colors works best.

Draw along the line first with the color. Then with one smooth, continuous line after another fill in the stripe.  The lines being fluid across will help create the illusion better than "chicken scratch" lines (that most kids want to do).  Tell them to use their whole arm to draw the line ("elbow should be moving!").  Maybe practice this on the blank sheet of paper.  Also, use the blank sheet under the project to catch marker marks ("all the way to the edge of the paper!") 


I did this recently with a mixed age group at a day care.  Sometimes while creating lesson plans, we get so wrapped up in creating something elaborate and spectacular, that we forget the basic lessons. This simple lesson can lead into much larger lessons and cover SO many basic elements (and principles) of art.  
This lesson is for ages 4th grade and above.

My completed one.

                                     5th Grader                                                 1st Grader (Advanced)
                                                                                                                                (I helped him draw the initial lines)


The Kids getting their Art on!


---------------------------------------------------------------------------------

Next Blog's Project:

CUBES

The kids created these after they finished their "Op Hands."  They loved these so much they wanted to make a TON more and build cities!


Sunday, July 28, 2013

Let the discoveries begin!

I have been a teacher my entire life.  I went through school observing my educators and discovering that part of me.  My teachers always paired me up with my peers to "teach."  I was also an Artist.  It took until high school for me to realize Art was what I wanted to teach.
I love art.  Let me rephrase that, I love the process of creating art and helping others discover those processes, in turn, discovering something unique about themselves and the world around them.  Art lends itself to teach anything.  Yes, math, english, science, history are all important.  But, ART takes those content areas outside the classroom, into the world, to be applied to a greater, enduring understanding.  Some argue that art is a support in education, opposed to a "main," critical piece of the learning process.  I say art is the main, most critical piece to create a differentiated, interdisciplinary course of learning (every content specialist says that about their field :).  All subjects must work together and build on each other to provide what is needed for our students.  I believe in process versus product.  The process is where the learning takes place.  The product is a happy, or not so happy outcome, but what is learned and can be applied to the future is what is important.

I have taught many art classes in galleries, to homeschoolers, and various other venues.  The last several years I have been in college studying to become a certified Art Educator in Missouri.  I enter my last year this fall, starting student teaching in the spring.  I cannot wait to have my own classroom!!


Find more about the importance of Art Education at these awesome organization's websites:

 Missouri Art Education Association MAEA    and the National Art Education Association NAEA